by abduzeedo
Last Saturday while chatting with a friend of mine he asked me how to create some fluffy style clouds, he told me that he has been seeing that quite often on Dribbble. I decided to check that out and there were indeed lots of amazing cloud designs, then I thought to myself that it would be a cool idea create one in Photoshop as well.
So in this tutorial I will show you how to create an wallpaper with some very stylized and super fluffy clouds in Photoshop. We will use basic tools and Layer Styles to create the effect. The whole process will take from 30-45 minutes but I believe there is quite a few nice tips for those who are beginning in Photoshop.
Step 1
Open Photoshop and create a new document. I am using 2560x1440 pixels for the size. After that make the background layer editable by double clicking on it, then go to Layer>Layer Styles>Gradient Overlay. Use Radial for the Style and for the colors use #ddeffa and #96ccee for the light and dark colors.

Step 2
With the Ellipse Tool (U) create a circle. The color doesn't really matter at this point.

Step 3
Createa nother circle and move it to the right side of the previous. Make it a little bit smaller too.

Step 4
Add another circle next to the previous one. Use the image below for reference, notice that the circles overlap one another.

Step 5
Let's add yet another circle, this time a much smaller one and on top of the previous one.

Step 6
To finish the shape of the cloud add another circle, this time a bigger one. Once you have the cloud shape you like, group them and duplicate the group, then go to Layer>Merge Layers. You will have one layer with the cloud but the circles will be necessary later on in the tutorial

Step 7
Select the layer with the cloud, the one we merged, and go to Layer>Layer Styles>Color Overlay. Use white for the color.

Step 8
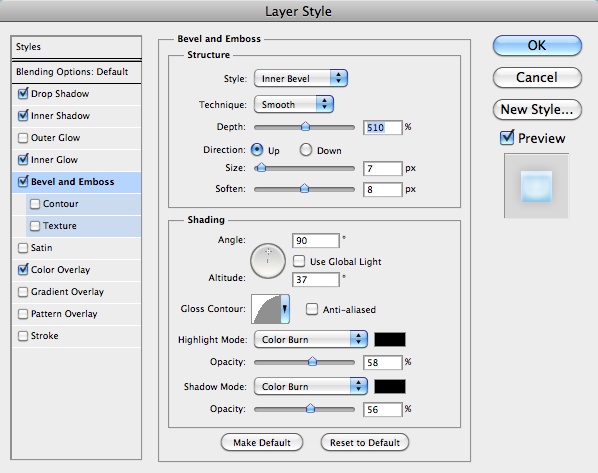
Select Bevel and Emboss. For the Style use Inner Bevel, for the Depth 100%, for the Size 8 pixels, for the Soften 16 pixels, for the Angle 90º, for the Altitude 37º, for the Gloss Countour use the one I used in the image below. Also for the Highlight Mode and Shadow Mode use black for the color with Color Burn for the Blend Mode and 54% opacity for the first and 60% for the last.

Step 9
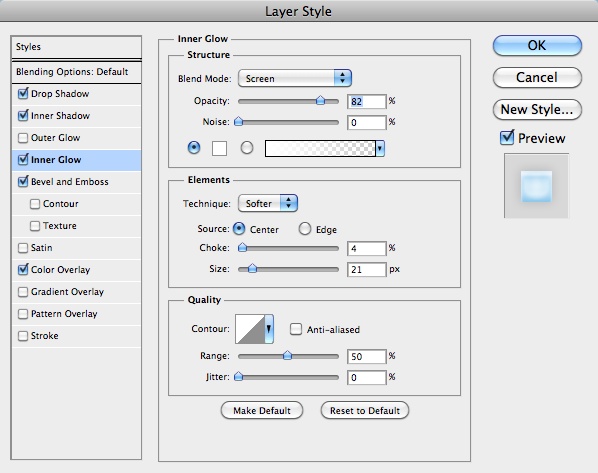
Select Inner Glow. Use 100% Opacity with white for the color and then Edge for the Source, 0% for the Choke and 100 pixels for the Size. Use the image below for more values.

Step 10
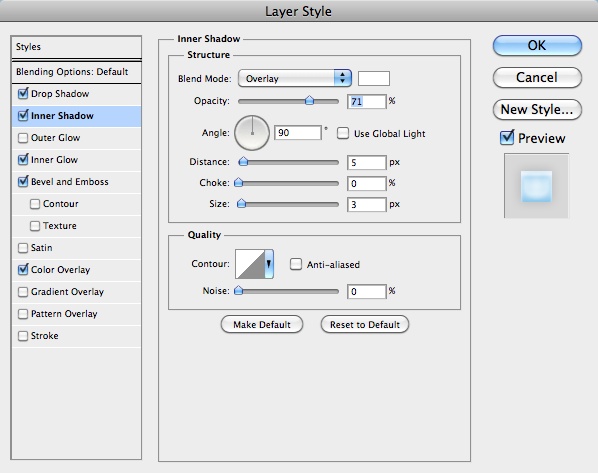
Now select Inner Shadow and then folow the image belo for the values.

Step 11
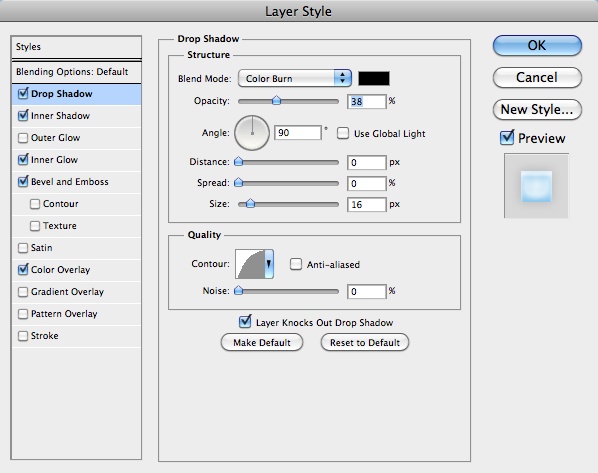
The last Layer Style we will use is Drop Shadow, it wold not be exactly necessary in terms of realism but the idea of the shadow is to give some contrast between the cloud and the background as they use the same colors.

Step 12
Here is the final result of the cloud we created with the layer styles. It's already a very nice outcome however I think it still needs some depth.

Step 13
To add depth we will do something really simple. Using the circles for reference, we will create new layers with them so they will have the same layer styles as the cloud but in circles, that way we will add some volume to our cloud. The first thing though will be reduce the opacity of the cloud layer to 30%.
Now, create a marquee selection of one of the circles, then select the cloud layer and duplicate and go to Layer>Layer Mask>Reveal Selecion. Move this new layer so it is underneath the cloud.

Step 14
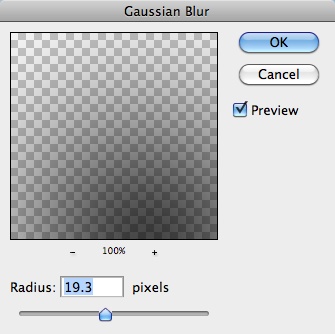
Select the mask of the circle we created in the previous step and go to Filter>Blur>Gaussian Blur. Use 20 pixels for the Radius.
Step 15
With that amount of blur the circle gets very subtle, like the image below. So if you want to have more highlight use less blur.
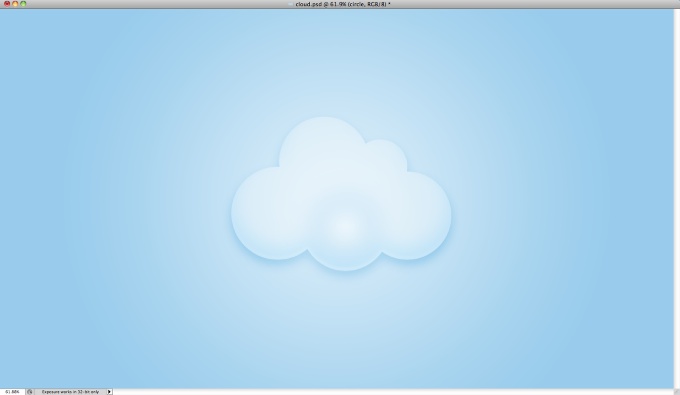
Step 16
Repeate the same thing for the other circles. Notice that you can unlink the layer mask from the alyer and move the layer to create some more random effects, like I did here in the circle on the left.
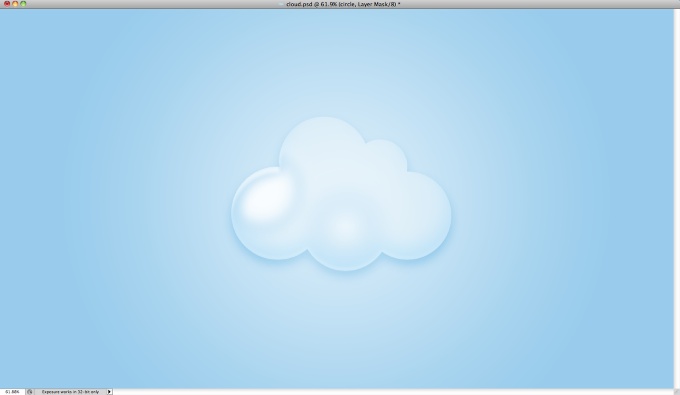
Step 17
Here is the final result I got after adding the volume. The cloud now looks super fluffy. But still it's not done.
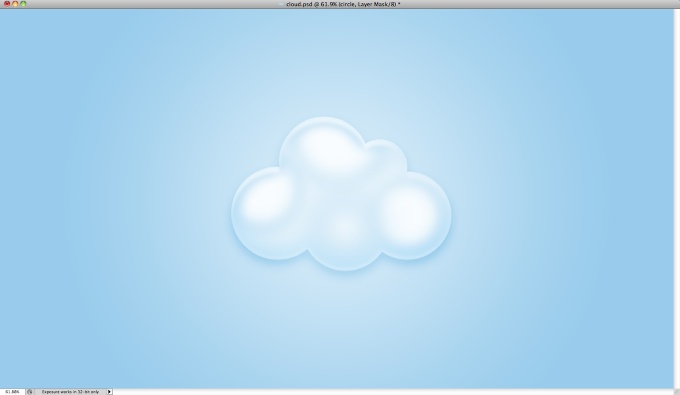
Step 18
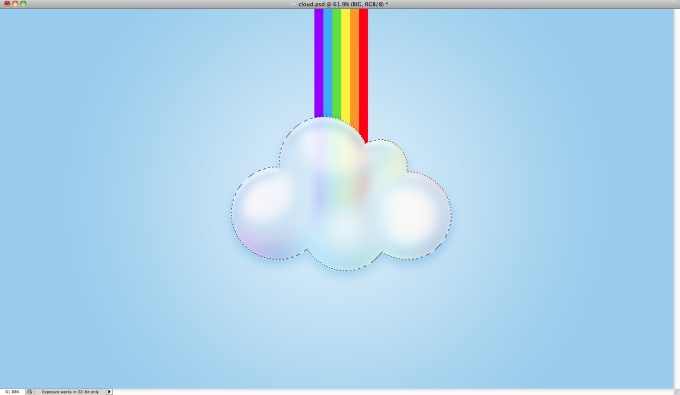
Time to add some rainbows, I created this one using rectangles with the rainbow colors. After that I merged into one layer and applied a gaussian blur in the area that is underneath the cloud to create a nice transparency effect.
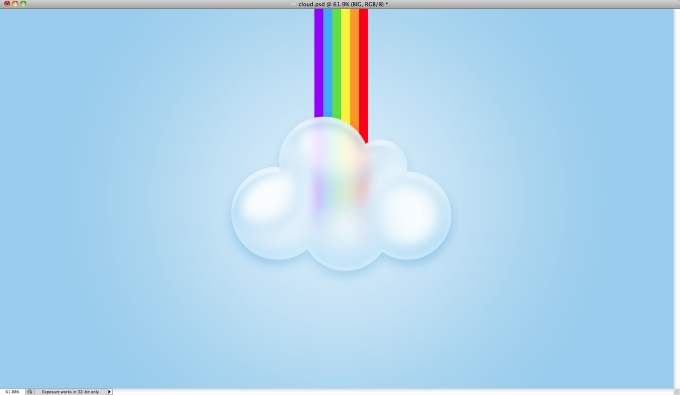
Step 19
Create a marquee selection with the shape of the cloud and add a new layer, the fill it with the rainbow colors and apply a guassian glur with at least 100 pixels for the radius. After that move it underneath the other layers used to create the cloud.
Step 20
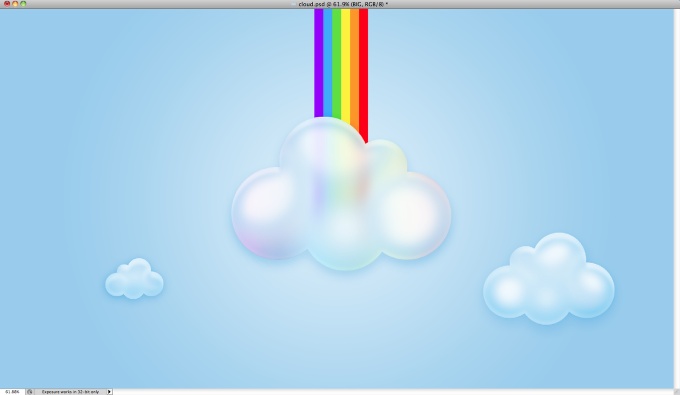
Duplicate the cloud twice. Resize and flipp them horizontally to create a nice composition. Notice that I didn't duplicate the rainbow colors.
Step 21
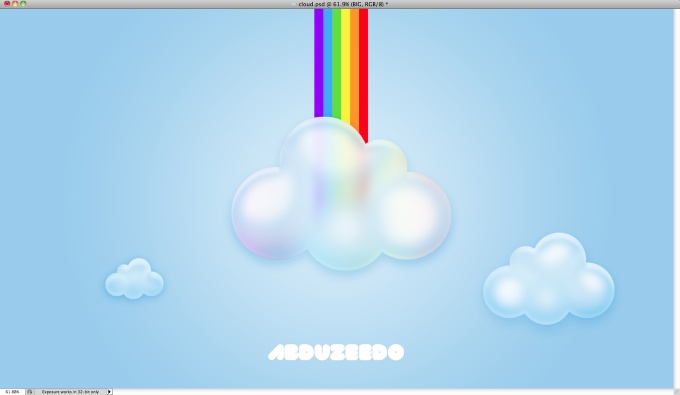
Now let's add some text. I used Val for the font and just add the word Abduzeedo in white. But applied some Layer Styles to create the same fluffy effect.
Step 22
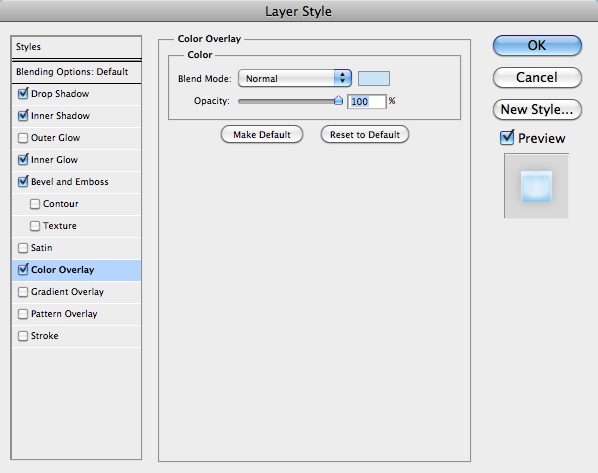
For the text layer styles just follow the values in the images below.
Step 23
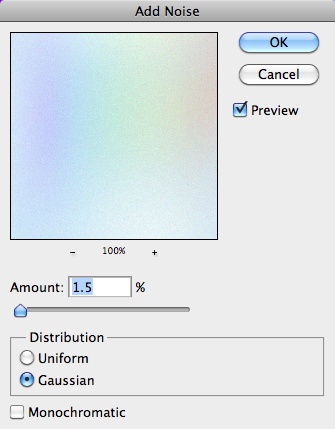
Duplicate all layers and merge them into a one, then go to Filter>Noise>Add Noise. Use 1.5% for the Gaussian.
Conclusion
After a few steps and a good 45 minutes of work we have a nice fluffy style cloud design. I am always trying to learn new ways to use layer styles, I think it's one of the most powerful features in Photoshop, for this tutorial I answer a question of a friend of mine who wanted to know how to create some nice icon style clouds but next time might be one of your questions. So if you have any suggestion for tutorials just send us an email with the effect you would like us to show how to do it, if we cn of course :)

Click on the image for full preview
