by abduzeedo
In this tutorial, I will show you how to use the Slice Tool in Pixelmator to, of course, slice a design to be coded into a functional Web site. I will also show you the HTML/CSS walk-through process. In the end, you will be able to download the files and tinker with them as well.
Step 1
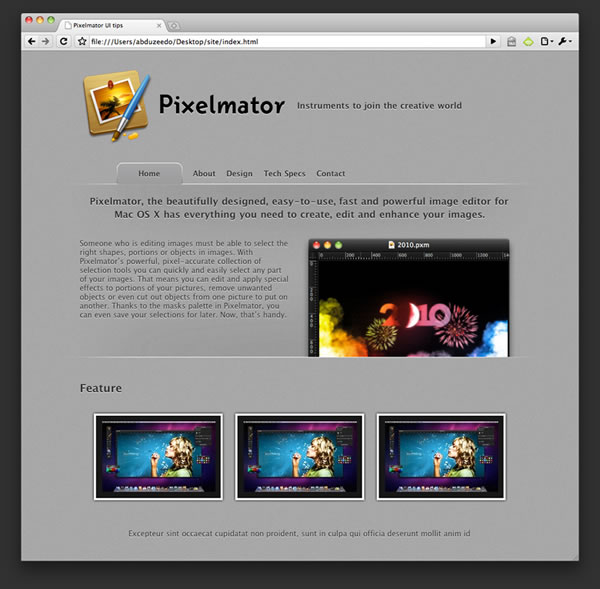
Open the Pixelmator file we created for our UI tips tutorial.
Step 2
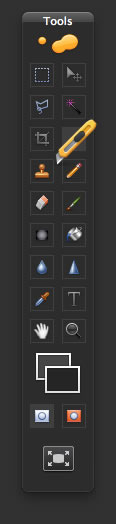
The tool that we will use in this tutorial that will allow us to transform our design into a Web page is the Slice Tool (K). Basically we will use this tool to select the areas that will be save-as images. We won’t need the whole design, just a few parts that will be a part of the UI (background, logo, buttons, screenshots).
Step 3
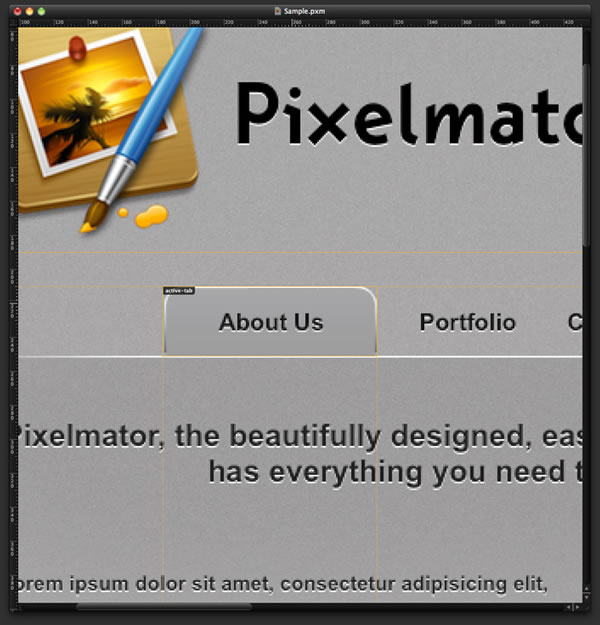
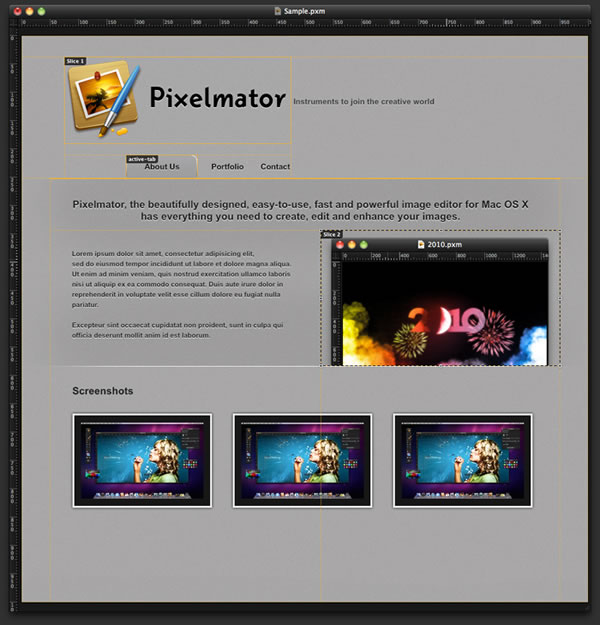
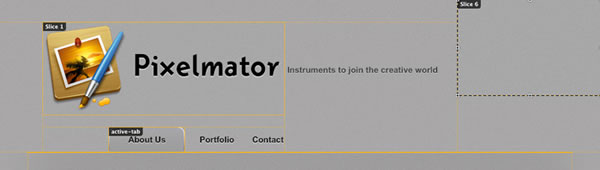
With the Slice Tool (K) selected, create a rectangle slice around the logo as the first slice. Notice that I didn’t include the text next to it because that will be HTML text.

Step 4
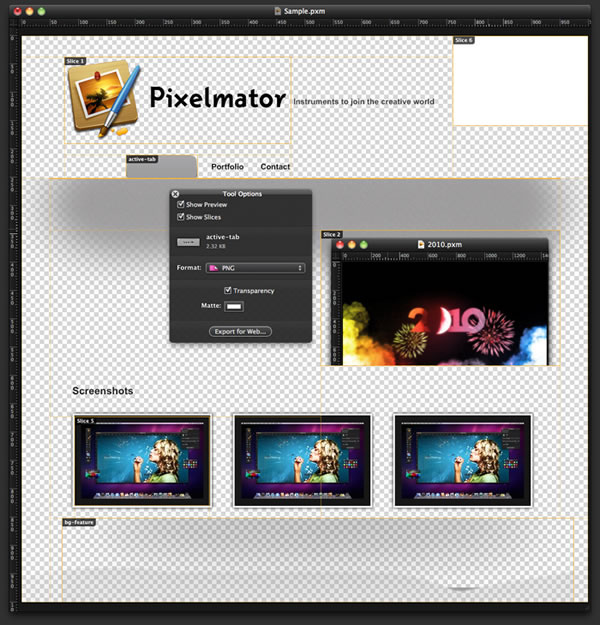
Now select the Tab of the navigation. Try to be very precise when slicing your site because a single pixel can disrupt the alignment later on in the HTML part.
Step 5
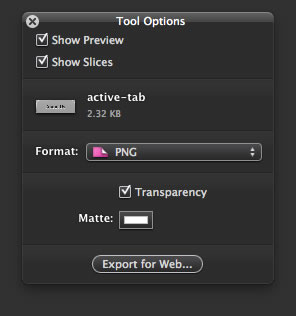
The cool thing about the Slice Tool is that we have some options; for example, if we are slicing a photo, we can use JPEG, while for UI elements, we can use transparent PNG. Also, you can change the slice name; in this case, my slice name is “active-tab.”
I’m using transparent PNGs for the UI elements and logo, and JPEG for the screenshots.
Step 6
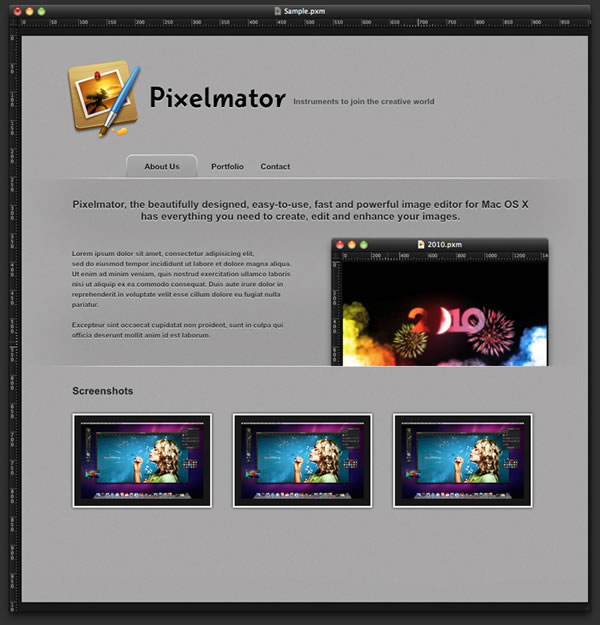
Keep selecting the parts of the design that need to be sliced. In the screenshot below, I created 2 more slices, including one for the line that divides the feature content that will be used twice, at the top and bottom of this section. I also selected the main screenshot.
Step 7
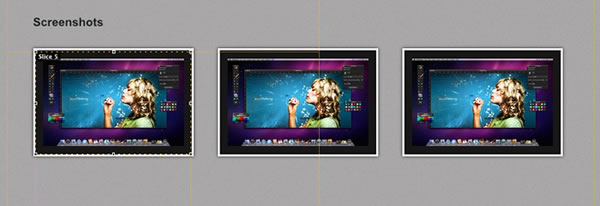
Here, let’s select only one screenshot, and then we repeat it in the HTML, or you can save different images later on..
Step 8
A very important part is the background. This slice will have to be exported first because we will need the background to be active for this UI element; otherwise, it will be transparent.
Step 9
This is a the shadow that we have in the feature section, but I moved it down to slice it separately from that area; once you export it, open the file and go to Edit > Transform > Flip Vertical to create the bottom shadow.

Step 10
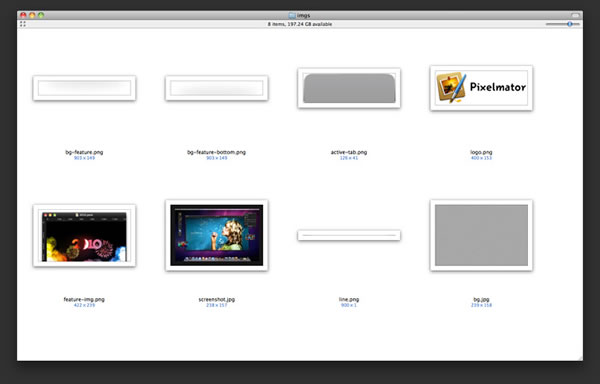
After you have created all of the slices and named them properly, go through the layer palette hiding layers that are not necessary: all of the text and the background. As I mentioned before, the background slice will have to be exported again later on with the background active.
With all the adjustments done, click on Export for Web in the Slice Tool Option. A dialog box will open asking where you want to save the slices. Create a new folder on your computer called “Site”; inside this folder, create another folder called “imgs.” Select the imgs folder and export all of the images into it.
Step 11
If you did everything right, you will have images like those pictured in the image below.
Step 12
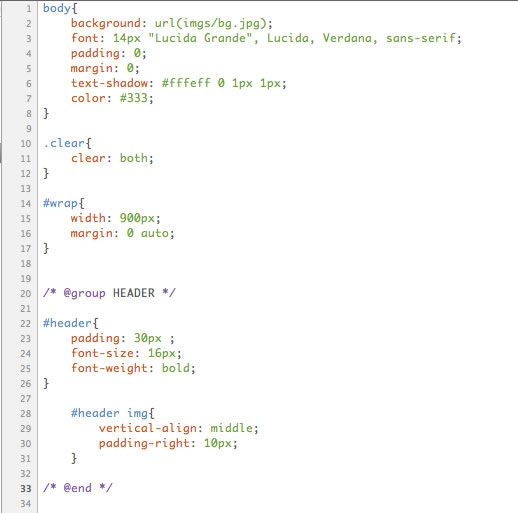
This is not exactly part of Pixelmator, but I will illustrate the HTML and CSS parts so you can understand what I did. Below, you can see the HTML file. We will use the “<div>” tag to create the structure of our HTML. We could use the new HTML 5 tags for that, but we would have to make some adjustments on the CSS, and it would have problems with the different browsers. However, I highly recommend that you check out HTML 5; it’s the future.

Step 13
If you take a look at the HTML code in line 8, there is a <link> tag where I linked the HTML file to the CSS file, the “styles.css” file. In this CSS file, I will define the look of the page using the images from Pixelmator.
CSS is like writing a cooking recipe: you indicate how the elements will look. You define the font properties (size, color, type, style, weight…), the background, the margins, the padding, and everything. The BODY element is the page itself. There you can find the background using the slice image from Pixelmator (bg.jpg). Also, there are HEADER styles.
Step 14
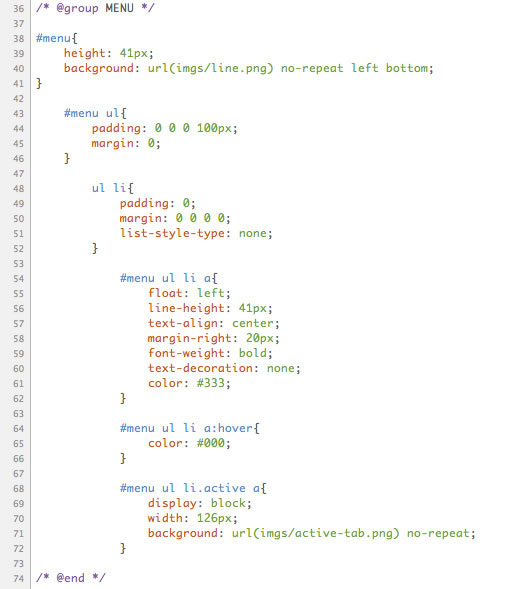
Here you can see how I coded the menu. The slice image of the tab is defined in line 71 for “#menu ul li.active a.”
Step 15
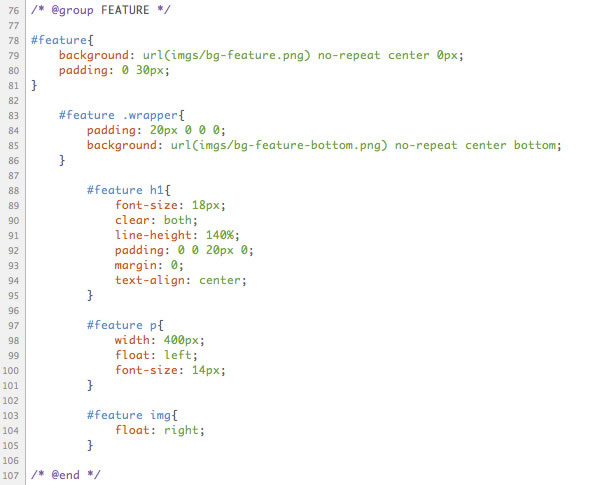
Here we have the FEATURE area; again, the backgrounds are defined in lines 79 and 85. Also, the font size for the title and the paragraph are present.
Step 16
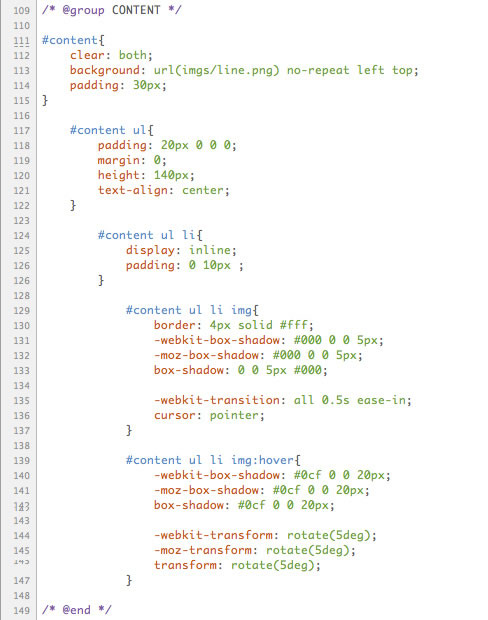
Here is the code for the screenshots section. I used some CSS 3 properties to create some eye-candy effects, like the -webkit-transition and the transform.
Step 17
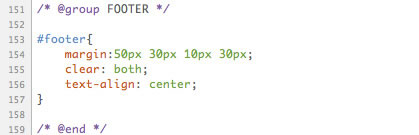
Here is the code for the footer; it is very simple.
Conclusion
Pixelmator’s Slice Tool (K) can definitely be used to design user interfaces. The secret of a good UI is simplicity and consistency, so it’s very important to optimize your design to have as few slices as possible as well as the code. Now it’s up to you. Once again, I highly recommend that you check out some tutorials on CSS and HTML; it’s not difficult, and in my opinion, it’s super fun.