by abduzeedo
In this tutorial, I will show you how to create a design inspired by the Dreamworks logo, with fluffy clouds and some light effects. We will use the clouds brush that comes with Pixelmator and some stock photos. The whole process will take about one hour.
This tutorial is part of a series of tutorials I have been writing for the Pixelmator Learn site.
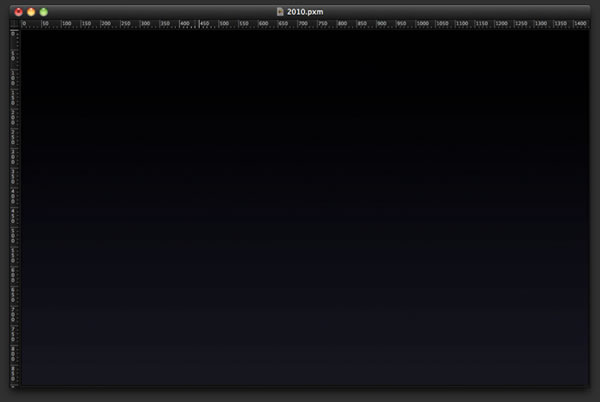
Step 1
Create a new document in Pixelmator, and with the Gradient Tool (G), fill the background with a Linear Gradient using Dark Blue and Black from the bottom to the top.
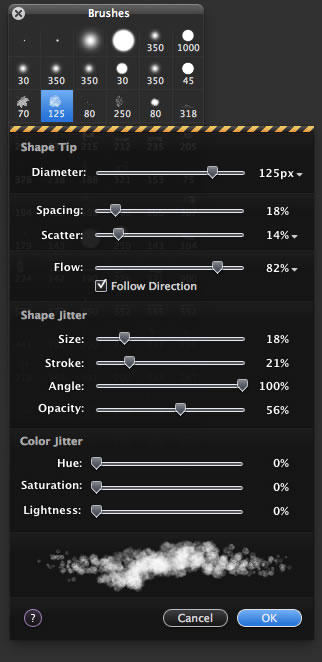
Step 2
Go to View>Show Brushes. Then double click on the clouds brush—this brush comes with Pixelmator. Let’s change some presets, especially the Opacity — we will change this to 55%. The Flow will be 80%. Use the image below for reference. This brush will be used to create the fluffy clouds.
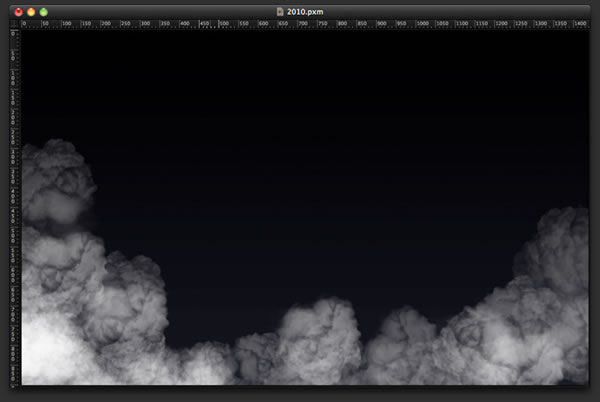
Step 3
Add a new layer, then select the Brush Tool (B) and white for the color. Next, with the brush we have created, start painting some clouds. Paint over some areas more than others, especially the corners.
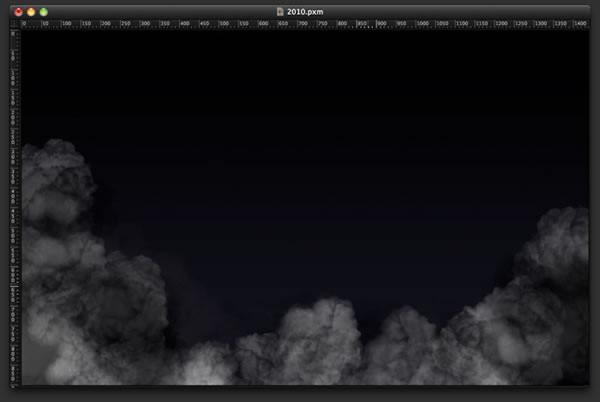
Step 4
Add another layer on top of the previous one with the white clouds. Now, still using the Brush Tool (B) with the same brush, paint some clouds using black for the color. The black is important to create depth in the clouds.
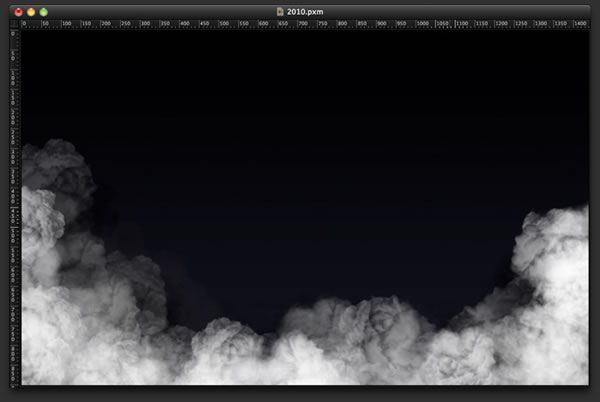
Step 5
Add another layer on top of the other two cloud layers. Paint with the same Brush Tool (B), now with white again. There will be three layers for the clouds: white beneath, then black in the middle, and white on top of the others.
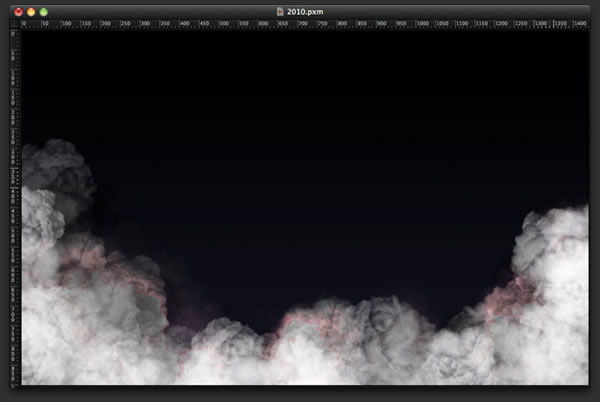
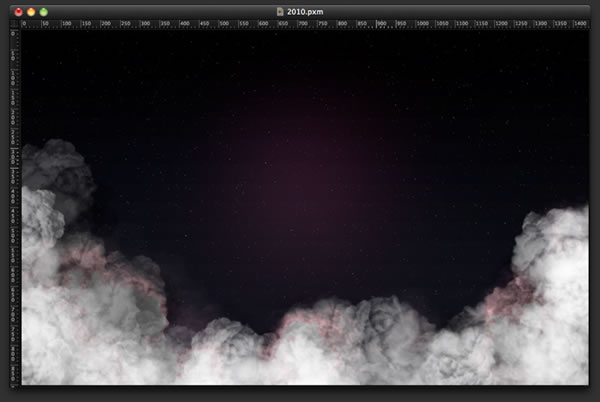
Step 6
Let’s create some light effects. Add a layer on top of the first cloud layer, the white one. Fill this layer with black, then change the Blending to Color Dodge. Select a salmon color (#a78888) and paint some clouds again. As you can see in the image below, light effects appear in the clouds.
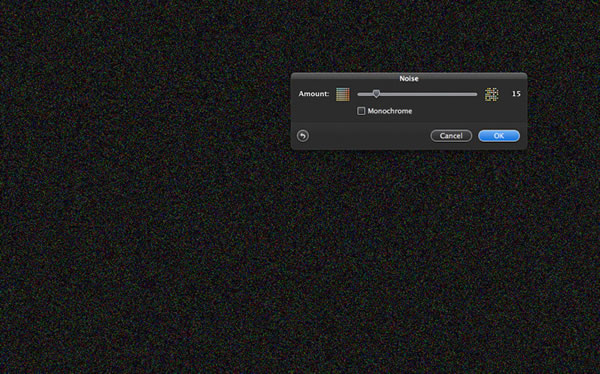
Step 7
Add a new layer beneath the others, and fill it with black using the Paint Bucket Tool (N). After that, go to Filter>Stylize>Noise. Use 15 for the Amount, and leave the Monochrome option unmarked.
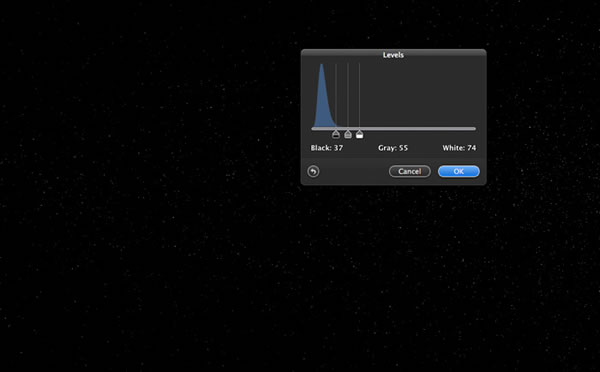
Step 8
Go to Image>Levels. Set the Black input to 37, the Gray to 55, and the White to 74. That’s the easiest way to create stars. You can also add some blur and repeat the steps if you want to make bigger stars. After that, change the Blending to Screen.
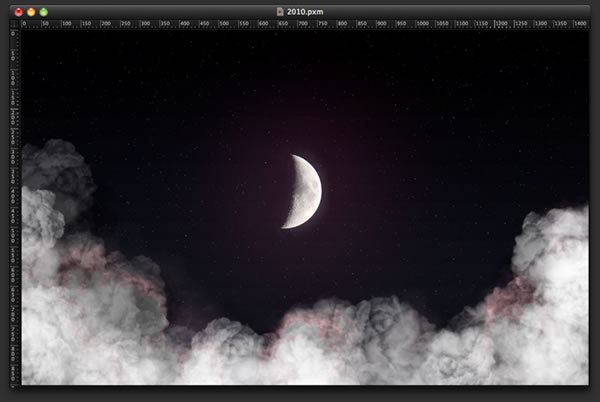
Step 9
Again, let’s add another layer, then select the Brush Tool (B) with a basic round brush. Using purple for the color, paint a nice spot of light in the center of your design. We will place a moon in the center of the design, so make it big. Also, change the Blending to Screen and the Opacity to 30%.
Step 10
For the moon, I used a stock photo. The one I used was courtesy of Shutterstock, and you can find it here: http://www.shutterstock.com/pic-40812199/stock-photo-moon.html. Place it in the center of the document, the go to Edit>Transform>Scale. Re-size it and also change the Blending to Screen.
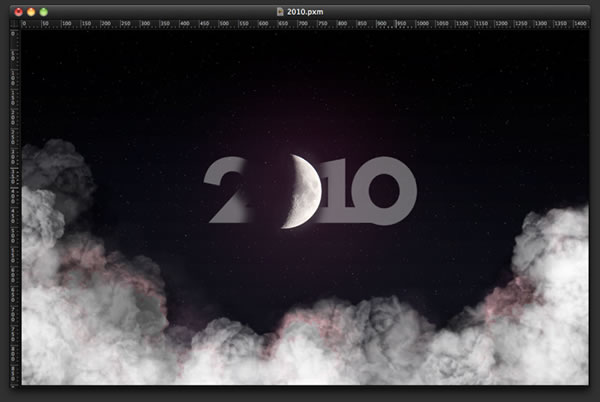
Step 11
With the Type Tool (T), type “2010.” Use a font with a zero that is very rounded, like a perfect circle. The one I used was Instanter. Use white for the color and change the Opacity to 40%. Then go to Layer>Rasterize Layer.
The type layer now is a bitmap
- With the Eraser Tool (E) delete the first “0.”
- With the Rectangular Marquee Tool (M), select the number “2,” then with the Move Tool (V), move it close to the moon; then select the “1” and move it close to the moon as well. After that, select the other “0” and move it very close to the “1.”
- With the Eraser Tool (E), select a basic rounded brush; for the size, make it a bit bigger than the moon. Also, the brush should be very soft. Then, delete the area beneath the moon, so a part of the “2” and the “1” will be affected.
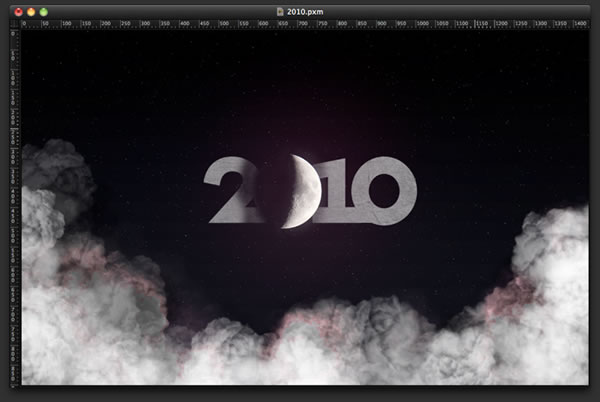
Step 12
Let’s add a texture to the text. Import a concrete texture, and place the layer on top of the 2010. Then go to Layer>Create Clipping Mask. The texture will be shown only where there are numbers. The texture I used is from Shutterstock and can be found at http://www.shutterstock.com/pic-16751947/stock-photo-large-concrete-wal….
Step 13
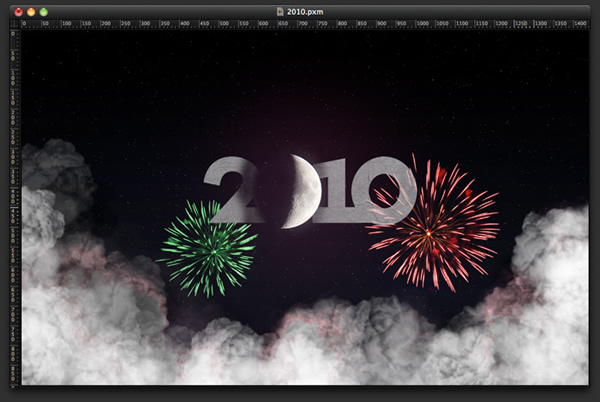
Now it’s time for some fireworks. Again, I used my account at Shutterstock to find some images. The one I used can be found at http://www.shutterstock.com/pic-43315858/stock-photo-many-golden-firewo…. Import the image and change the Blending to Screen. With the Eraser Tool (E), delete the areas of the image that are not necessary. To create more fireworks, duplicate the layer and rotate it (Edit>Transform>Rotate). Also, you can change the colors through Image>Colorize. I created two—one green and the other red—as you can see in the image below.
Step 14
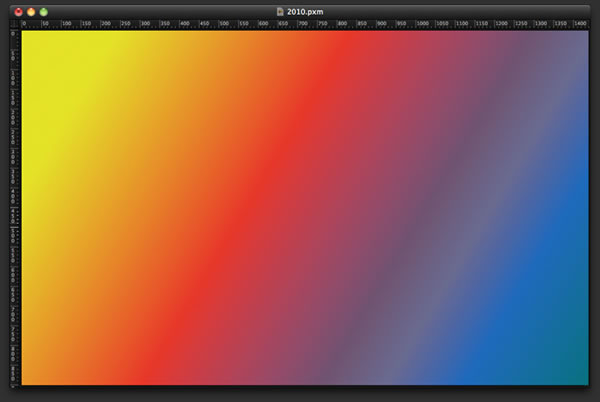
Add a new layer on top of the others, and fill it with a gradient. I created a gradient using Yellow, Red, Purple, and Blue for the colors. Use Linear Gradient and paint it diagonally in the layer.
Step 15
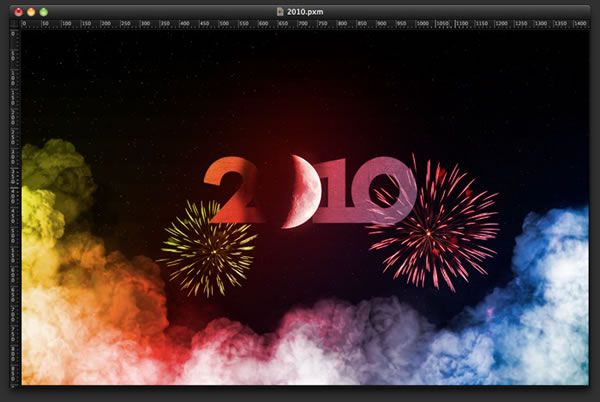
Change the Blending of the colorful gradient layer to Overlay. After that, select all layers and go to Layer>Duplicate Layer. With all the duplicated copies still selected, go to Layer>Merge Layers. You will have one layer with the design flattened.
Step 16
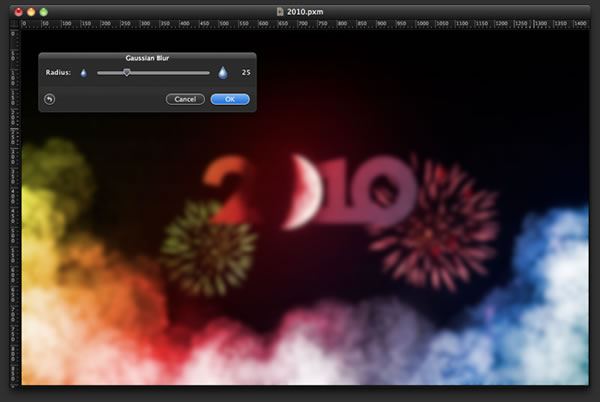
With the flattened layer selected, go to Filter>Blur>Gaussian Blur. Use 25 for the Radius. After that, change the Blending to Screen. This step will add a nice glow to the image. Tip: You can use the Eraser Tool (E) to delete some areas to prevent the glow.
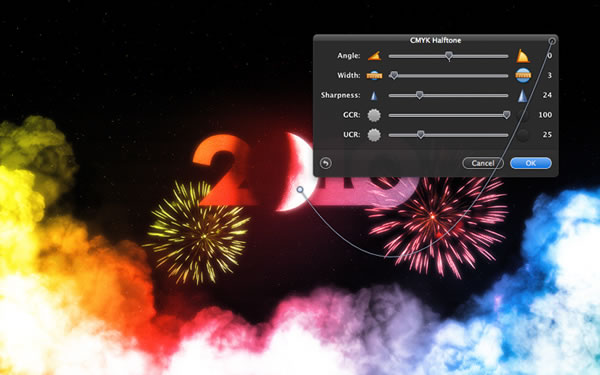
Step 17
Select all layers and duplicate them again. After that, merge all the layers to a new layer, and go to Filter>Halftone>CMYK Halftone. Use 3 for the Width, 24 for the Sharpness, and 25 for the UCR.
I love this filter because it gives that old printed style to the design, making it look retro and stylish.
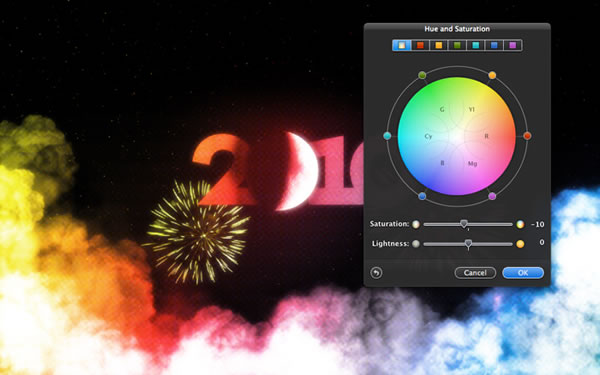
Step 18
In my opinion the colors were too vivid, so I went to Image>Hue and Saturation and reduced the Saturation to -10.
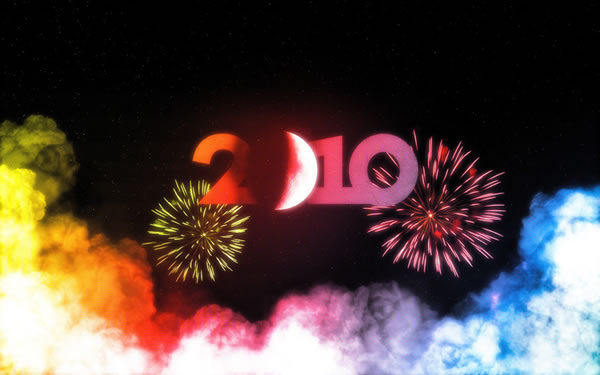
Conclusion
That’s it, the design is done. We used a basic brush from Pixelmator to create some fluffy clouds. Also, we used stock photos and blendings to match them together. The idea of this tutorial, and all the tutorials I’ve been writing for Pixelmator, is to practice using the tools and experimenting with the settings. I think the best way to learn is trying to see how the presets behave; that way, you can discover new possibilities that might be useful for your future designs. I wish a Happy 2010 to all, and I hope we can keep sharing and learning more about Pixelmator.
Download the Pixelamtor File
Click here to download the Pixelmator file used for this tutorial.


