Awesome Magneto Digital Painting Case Study by Eric Vasquez
This is a Case Study based off of the Marvel Villains Series that I just recently completed. The series consists of 8 digital paintings depicting some of the most evil villains in the Marvel Universe. As an avid comic book fan, I wanted to create something that I felt very passionate about and really take my time to try and develop my digital painting skills along the way.
The following is a closer look at the process for one of the eight paintings that all began with a pencil drawing. The entire project took just under a year to complete and can be seen in it’s entirety by visiting my site at http://www.ericvasquez.net or http://www.behance.net/EVasquez84
Step 01
Once I had an idea in mind for the villains that I wanted to use (in this case, Magneto) I began looking through comics and different images to get a solid base of reference material. From there, it was time to put the pencil to the page and start doing some sketches. For some of the characters in the series I did several thumbnails before arriving at a composition that I was happy with, but for Magneto, I ended up going with a pose that felt both powerful and dynamic.
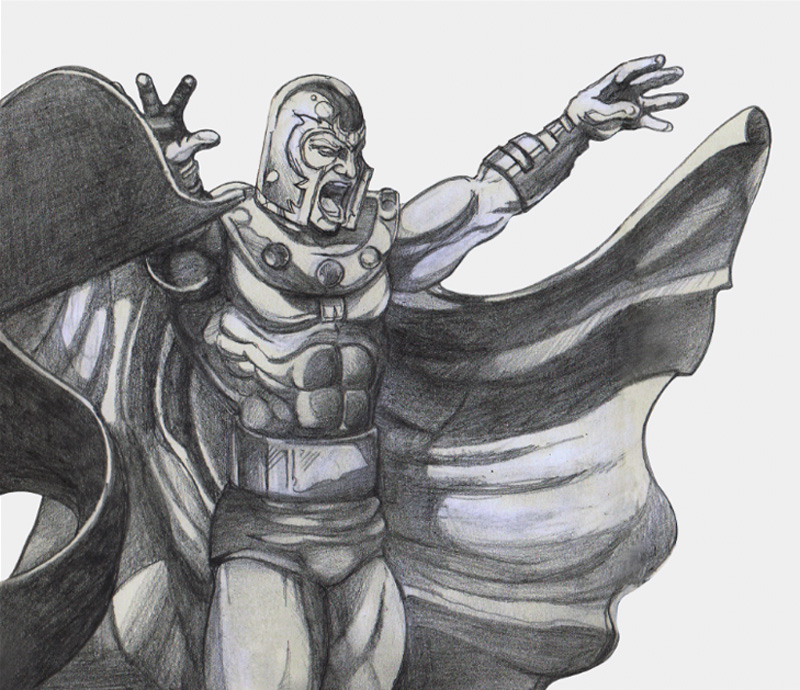
Step 02
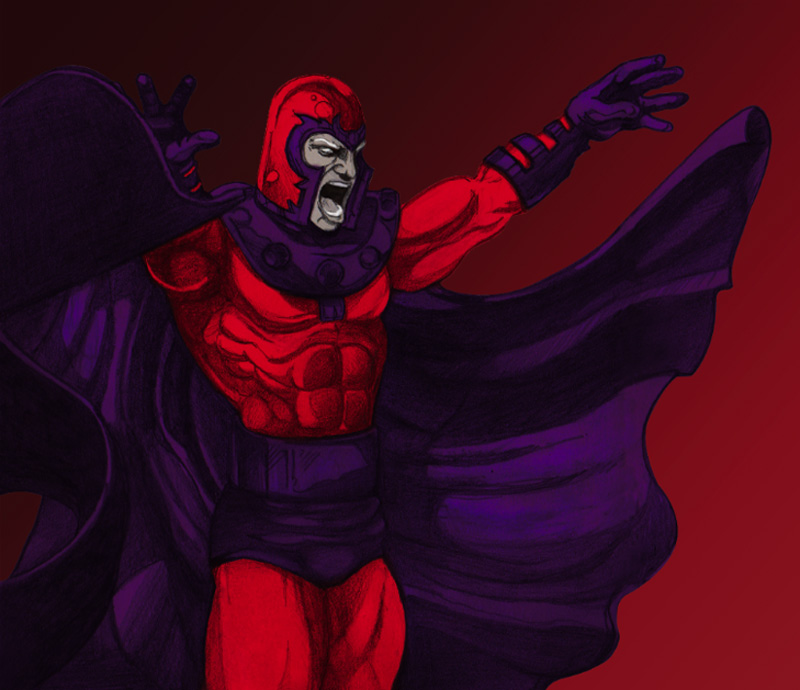
After sketching Magneto, I scanned the illustration into my computer and brought it into Photoshop where I proceeded to silhouette him and remove the background. I wanted to keep the backgrounds simple to keep the focus on the actual character, so I decided to use a basic red gradient dark to light.
The next step was to make a selection of Magneto and then do some color blocking to fill in the different areas of his costume. I like to work this way when starting off because it allows you to have more control over the individual pieces of the character, at least until you get it to a point where you can work on the overall image and focus on the bigger picture.
Step 03
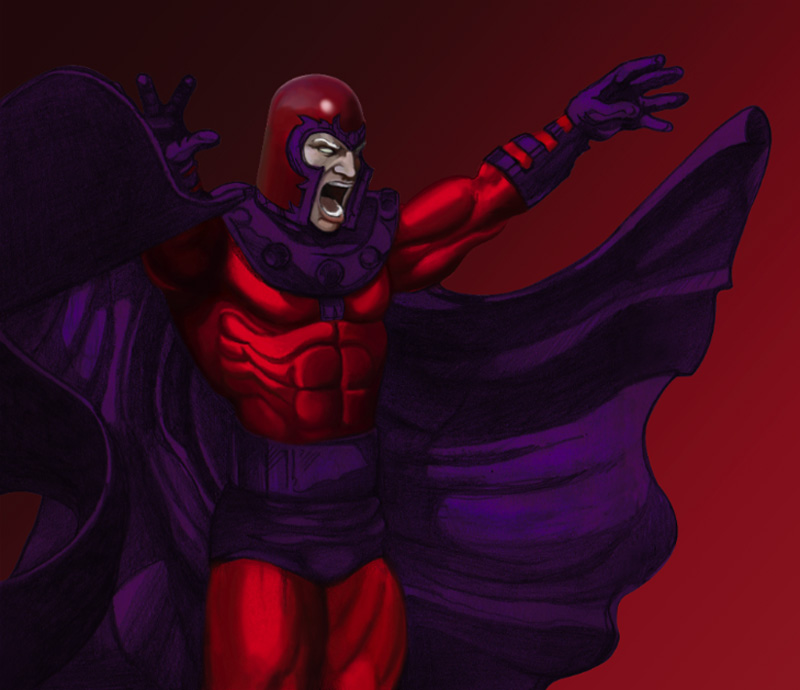
Now that I have my flat colors laid out I can start rendering the different areas of the body/costume. I don’t really think it matters exactly where you begin this process, but many would say that it’s best to start with the face and the head. In this case, I started with the chest to try and develop a palette using only reds to create a good range of value.

Step 04
After establishing some values in the chest area I dove right into the helmet, which I really wanted to give some form and dimension. One way to do this is to place a light color next to a dark color, and then add another light color on the other side until it starts to take shape. In the image below you will notice how the top of the helmet has some rim lighting along the edge along with some reflections on the front of the helmet facing the viewer.

Step 05
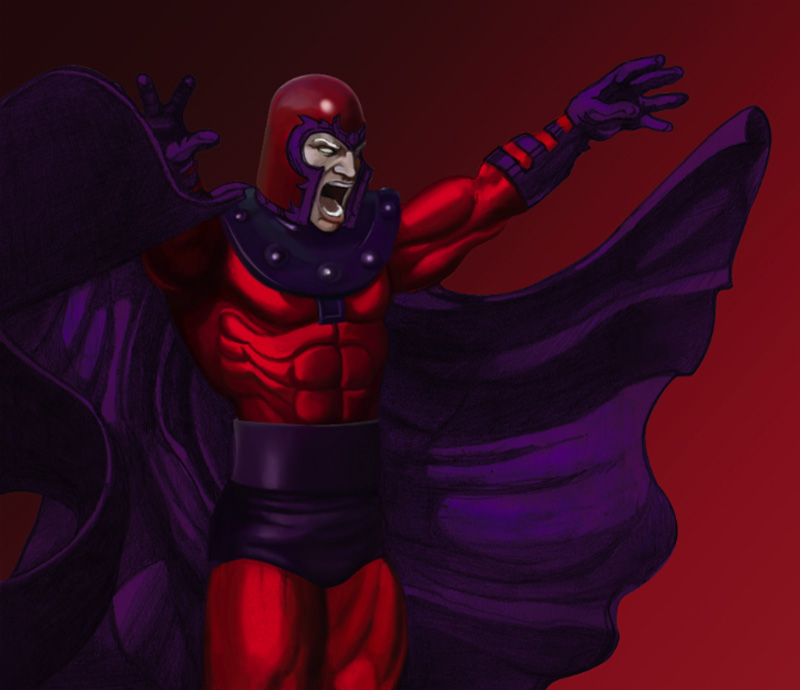
Continuing to work on the helmet and head area to bring out some definition and form. Also, I found that as I was painting I would cover up my pencil marks as I went along so that by the time the piece was done you would no longer need your original base illustration. Sometimes the pencil sketch can provide a nice effect, but in this instance I wanted to make it feel more like a traditional painting.
Step 06
Skipping ahead, I began to render the darker purple areas of the costume including Magneto’s belt and upper chest piece that goes around his neck and traps. It can be a bit tricky rendering different materials based on the amount of light that they reflect. For example, the tights appear to be much less reflective than the upper chest piece that helps to give the illusion that it’s made from a different material like cloth as opposed to metal.
Step 07
Keeping the same rule of thumb in mind, I moved onto the hands and gloves to create a shiny/metallic kind of feel to it that also adds realism. Notice that it doesn’t have to be incredibly detailed to be convincing to the eye. The fingers specifically are maybe two or three shades of color blended together, but by using a brush with either hard or soft edges, you can create some clearly defined highlights and shadows.

Step 08
In the next step I returned to the head so that I could finish off the purple pieces of the helmet. By having a few touches of lighter color with hard edges on an otherwise subtle transition of color, I was able to further reinforce the reflective qualities of the helmet.
Step 09
At this point I was pretty happy with the way things were looking but wanted to make another pass over the red areas of his costume with a slightly lighter shade of pink/white to add some highlights. Keeping in mind the type of material you may be rendering you don’t want to have a really sharp and crisp light source on a less reflective type of material. You will notice this especially on the arm and upper body where the highlights appear smooth, but help to add more form to the body.
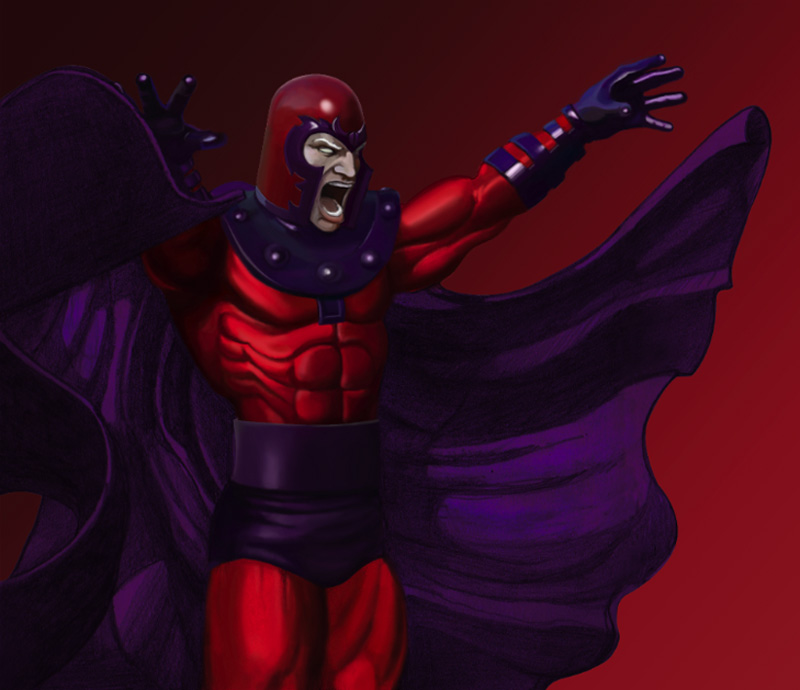
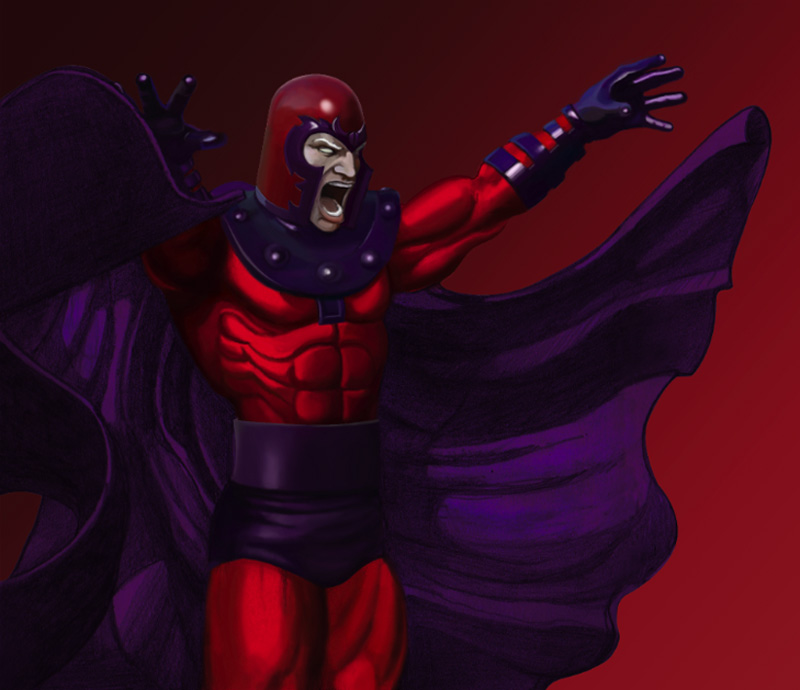
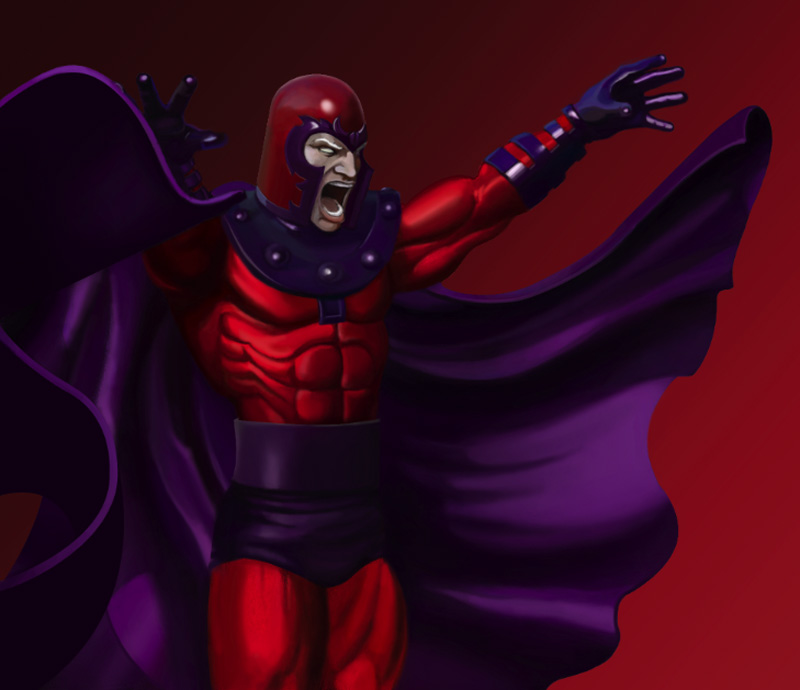
Step 10
After the rest of the body was complete it was time to move onto the cape with all of the folds and wrinkles. This was a bit tricky because some of the cape will cast a shadow and have an effect on the other parts, but you still want it to feel balanced in terms of light and dark. By focusing on each area of the cape a little bit at a time and rendering the folds, you will begin to see things take shape and really come to life.
The last step here was to add some slightly brighter areas of color where the cape would be facing the light source to bring those areas out. Conversely, the darker and more heavily shadowed areas will recede into space to create some depth.
Conclusion
Overall, this was a really fun project to work on, and in the process I feel that it has helped me to improve my digital painting skills along the way. There have been many times where I have started something and then felt discouraged, but with persistence and practice comes greater ability. If you have something you’ve wanted to try and learn for a while, don’t be afraid to fail because experience really is the best teacher.
I hope you have enjoyed this case study and if you haven’t checked out the whole series please feel free to stop by my site for more!
