by abduzeedo
For this week's tutorial, I will extend the Chrome Effect in Photoshop tutorial and add a super cool light effect simulation featuring a fan hole in a computer. We will use some images and Photoshop's layer styles for the whole tutorial. The process is quite straightforward but it is a little time consuming, roughly one hour to create your own image.
Step 1
Open Photoshop and create a new document, as usual, I am using 2880x1800 pixels for the dimensions so I can use it as a desktop wallpaper. Using the Paint Bucket Tool, fill the background with #201E1E for the color.

Step 2
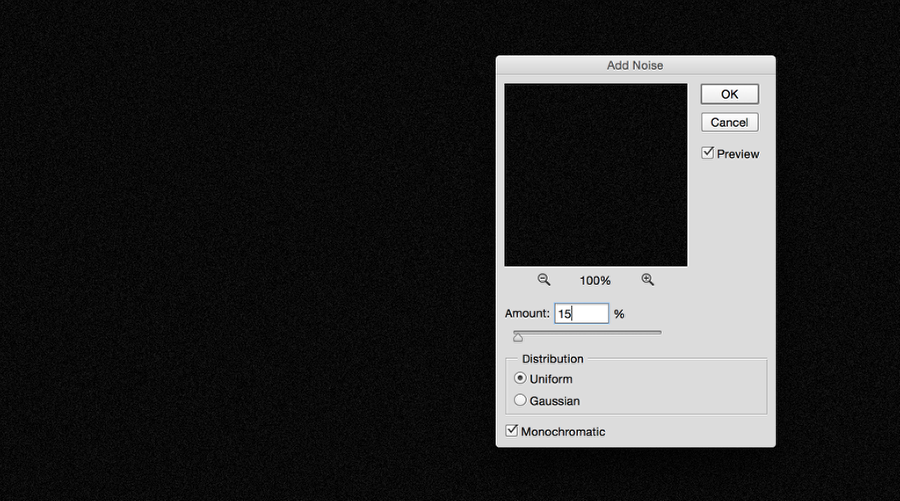
Add a new layer and fill with black. After that go to Filter>Noise>Add Noise. Use 15% for the Amount, Uniform for the Distribution and Monochromatic. This is pretty much the same process we did to create the plastic texture in our previous tutorials.
Step 3
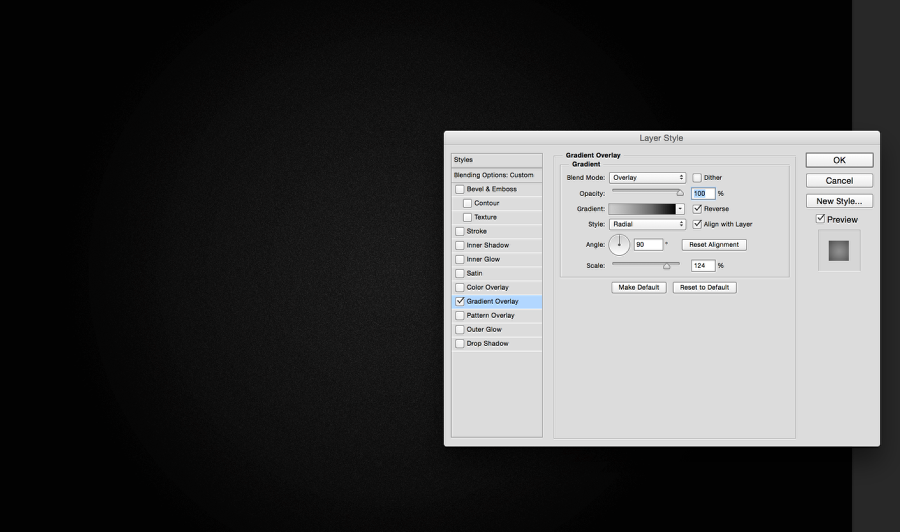
Duplicate the noise layer and then just flip it horizontally. After that group the 2 layers and apply a layer style for the group. Go to Layer>Layer Style>Gradient Overlay. Use Radial from mid-grey to dark grey.
Step 4
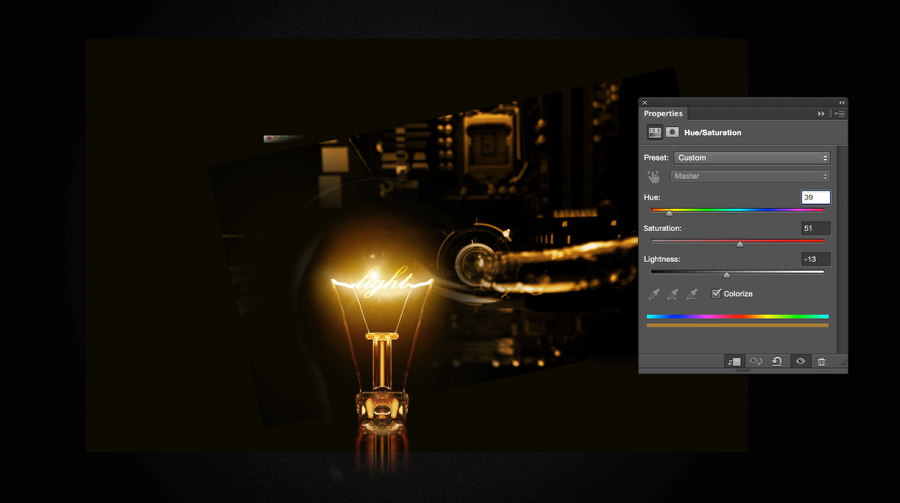
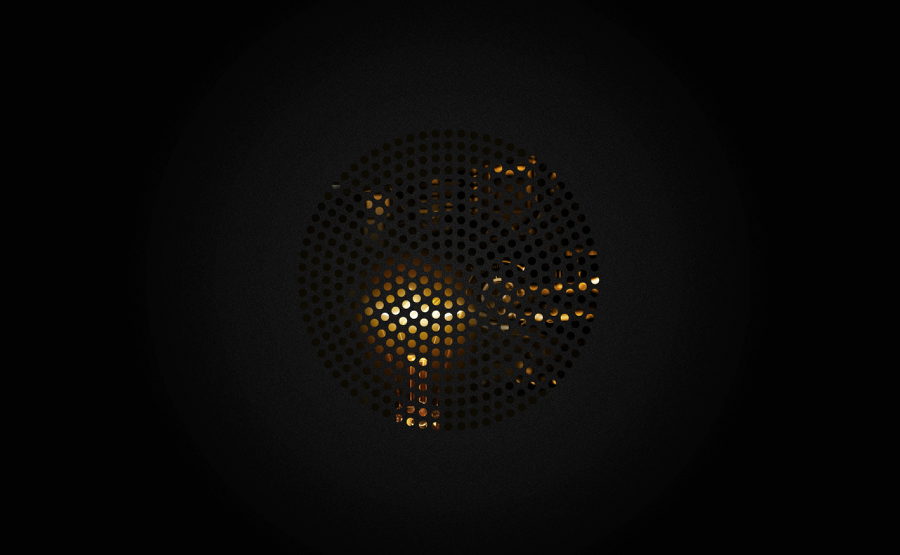
For the internal part of our speaker or computer search on Google Images for some video cards, they usually are super cool in terms of design. I also used an image with the light effect I did a long time ago for the Abduzeedo Book. You can use anything you want for the light effect. Merge both images and then go to Image>Image Adjustments>Hue/Saturation. Select Colorize with 40 for Hue, 50 for Saturation and -13 for Lightness.
Step 5
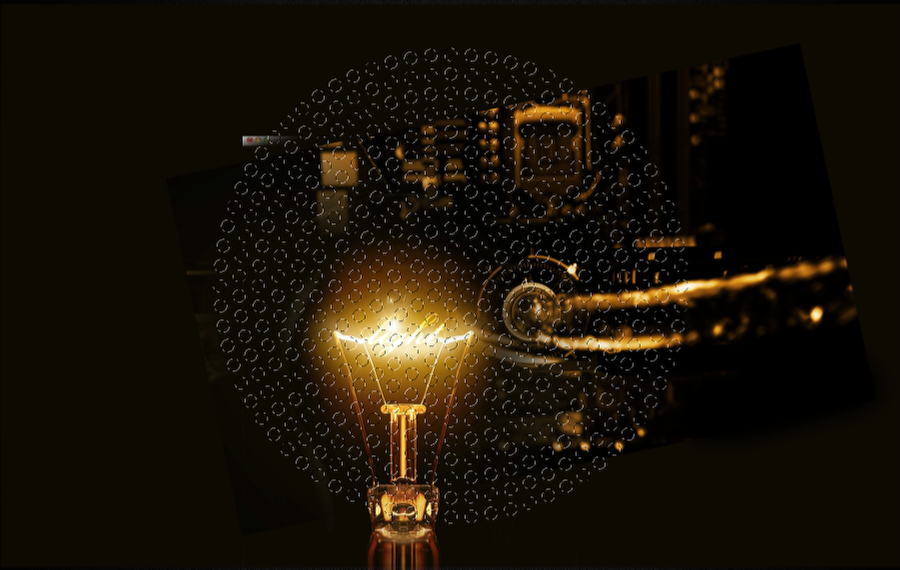
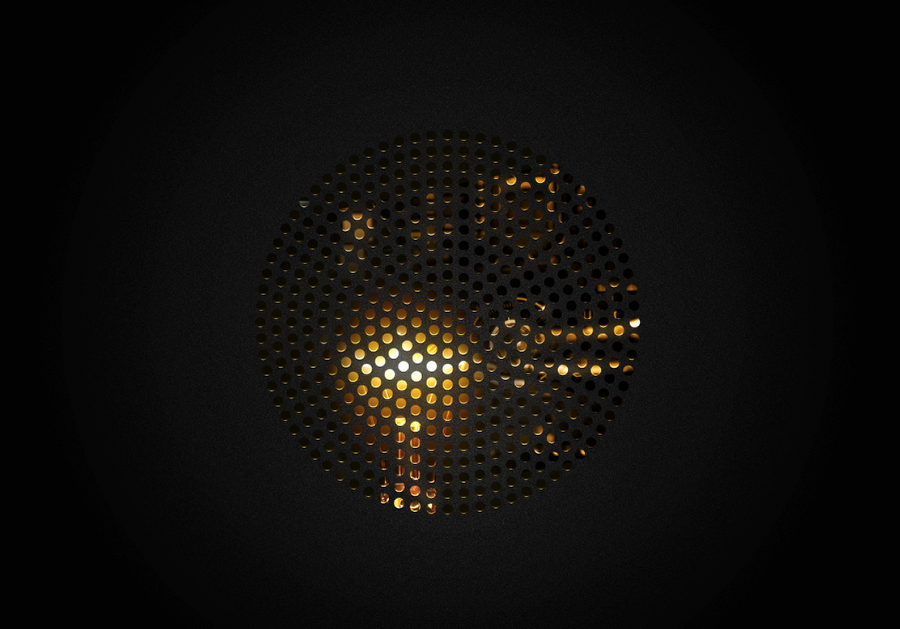
Time to mask everything. For my design I used a vector I found online with the circles like a round phone speaker. Create a marquee selection of the shape and mask the internals.
Step 6
This is what you will have after the masking.
Step 7
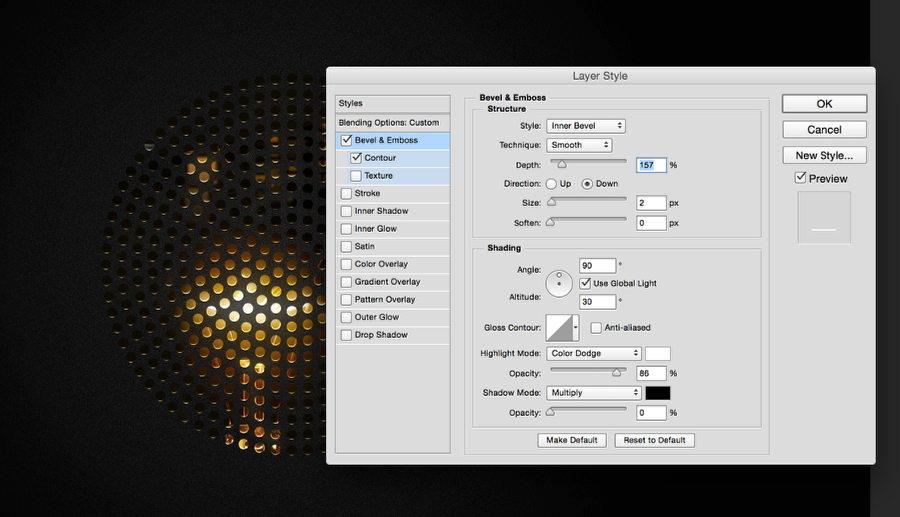
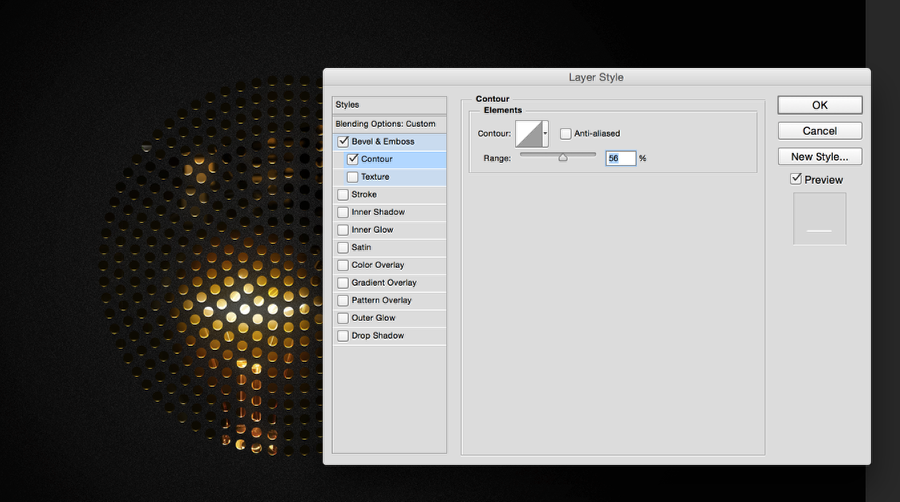
With the shape you used to create the mask go to Layer>Layer Style>Blending Mode. Change the Fill Opacity to 0. Select Bevel & Emboss and then use the values below, after that select Contour and use 56% for the Range. In the end, duplicate this layer and change the opacity to 10%.
Step 8
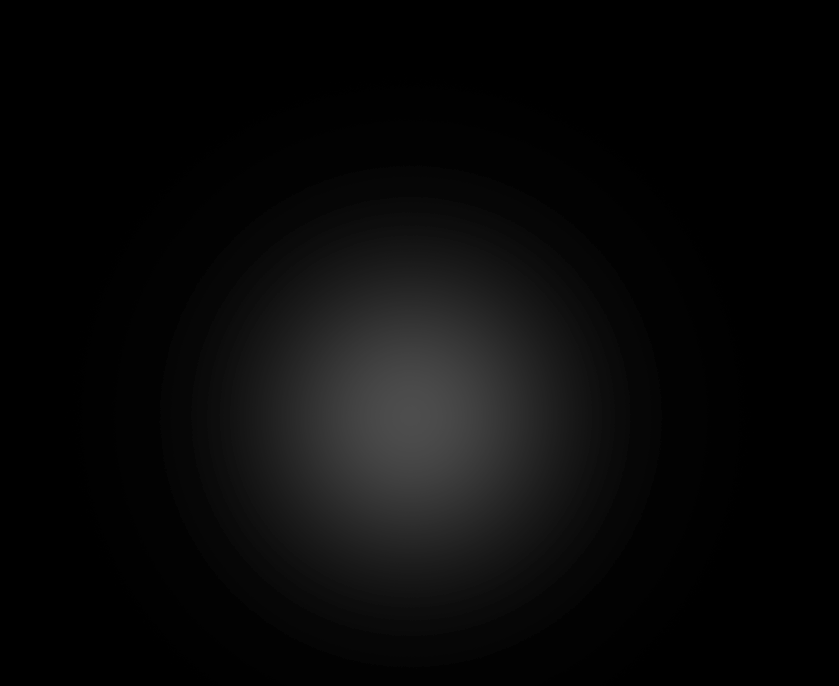
Add a new layer on top of the other layers and fill it with black. With the Brush Tool (B) paint a circle with a dark grey like the image below. After that change the Blend Mode to Color Dodge.
Step 9
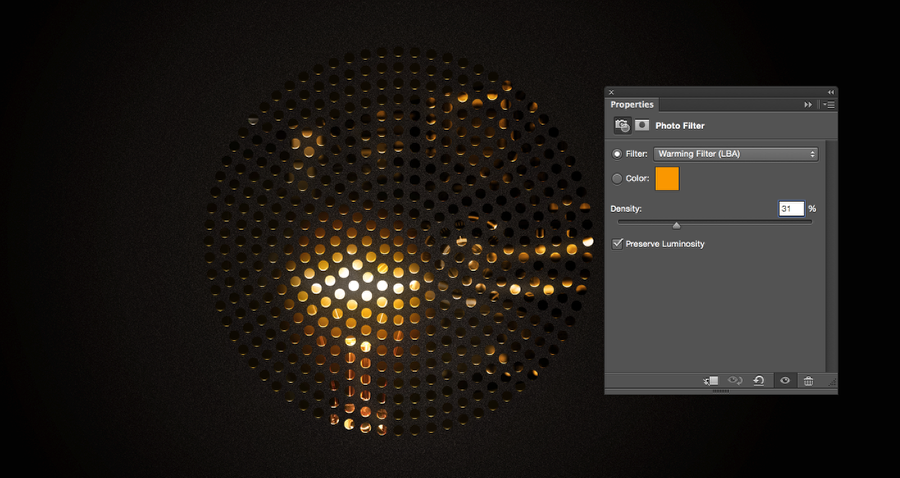
Go to Layer>New Layer Style>Photo Filter. Use Warming Filter at 30% Density.
Step 10
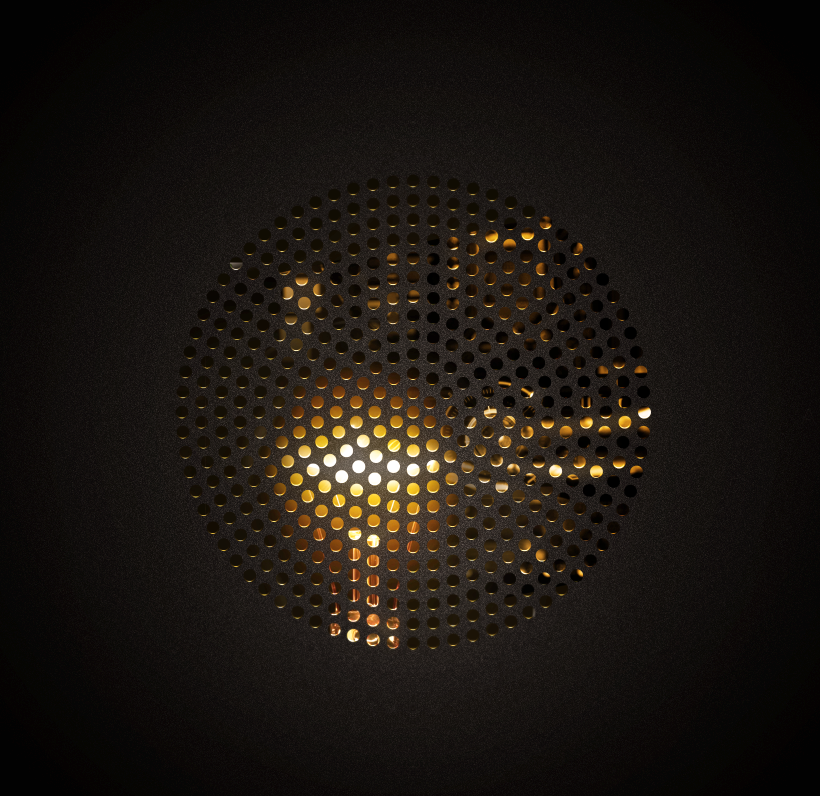
Select all layers and duplicate them. Merge the new layers and with the new layer selected go to Filter>Blur>Gaussian Blur. Use 15 pixels for the Radius. Change the Blend Mode to Screen at 70% Opacity.
Conclusion
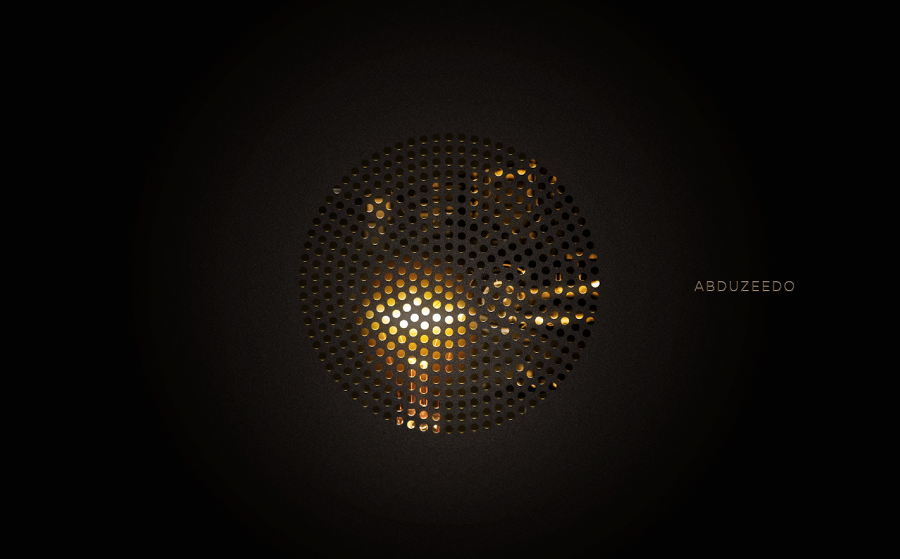
Now to finish the design just add your logo with the same nice chrome effect we created in our previous tutorial, Chrome Effect in Photoshop and your design will be done. Now it's up to you to come up with your own. I hope you have fun.


![Neon light effect in Photoshop [revisited]](/sites/default/files/styles/square_1x1/public/originals/hero_neon.png?itok=lP4mbIak "Neon light effect in Photoshop [revisited]")

