by abduzeedo
Last week I wrote a tutorial on how to create the new Apple iPhone SE wallpaper using Photoshop. It was a really fun little tutorial and I also saw another designer making the same effect in Figma. It’s amazing to see so many talented people as well as incredible tools at our disposal. With the same image in mind I decided to try to recreate it in code using SwiftUI and it turns out to be a fun exercise with a quite beautiful result.
Note: there are some banding on the gradient. My knowledge is limited about SwiftUI but I am sure there is a solution. Also there's a weird glitch in my animation, but that’s not really needed. So here’s what I did.
Video preview
Step 1
Start with the simple rectangle view. I called my struct ColorBar
struct ColorBar: View {
       var body: some View {
        Rectangle()
    }
}
Step 2
Then I created 5 different variables for the gradients and applied to the fill of my rectangle. The first and last colors I used 0 for the opacity. Also make sure the startPoint is .top and endPoint is .bottom.
struct ColorBar: View {
    var g1:Color = Color(red: 95 / 255, green: 71 / 255, blue: 202 / 255)
    var g2:Color = Color(red: 255 / 255, green: 175 / 255, blue: 196 / 255)
    var g3:Color = Color(red: 230 / 255, green: 210 / 255, blue: 173 / 255)
    var g4:Color = Color(red: 244 / 255, green: 160 / 255, blue: 18 / 255)
    var g5:Color = Color(red: 228 / 255, green:0 / 255, blue: 0 / 255)
    var body: some View {
        Rectangle().fill(
            LinearGradient(gradient: Gradient(colors: [g1.opacity(0),g1,g2,g3,g4,g5,g5.opacity(0)]), startPoint: .top, endPoint: .bottom))

    }
}
Step 3
Putting everything together. First I did it all manually, I mean I added 9 instances of my colorBar and changed the value of their height using the frame modifier. I created a simple variable called multiplier to use as the base for the difference in heights.
struct ManualBars: View{
    var multiplier:CGFloat = 60
    var body: some View{
        GeometryReader { geometry in
            HStack(alignment: .center, spacing:0){
                ColorBar().frame(height: geometry.size.height - (multiplier * 1)).zIndex(5)
                ColorBar().frame(height: geometry.size.height - (multiplier * 2)).zIndex(4)
                ColorBar().frame(height: geometry.size.height - (multiplier * 3)).zIndex(3)
                ColorBar().frame(height: geometry.size.height - (multiplier * 4)).zIndex(2)
                ColorBar().frame(height: geometry.size.height - (multiplier * 5))
                ColorBar().frame(height: geometry.size.height - (multiplier * 4)).zIndex(2)
                ColorBar().frame(height: geometry.size.height - (multiplier * 3)).zIndex(3)
                ColorBar().frame(height: geometry.size.height - (multiplier * 2)).zIndex(4)
                ColorBar().frame(height: geometry.size.height - (multiplier * 1)).zIndex(5)
            }
        }
    }
}
Conclusion
After that I spend a bit more time trying to automate the process with ForEach.I still struggle with the concept but here’s the final code. Ah! I also animated the bars when the app opens as well as when you tap.
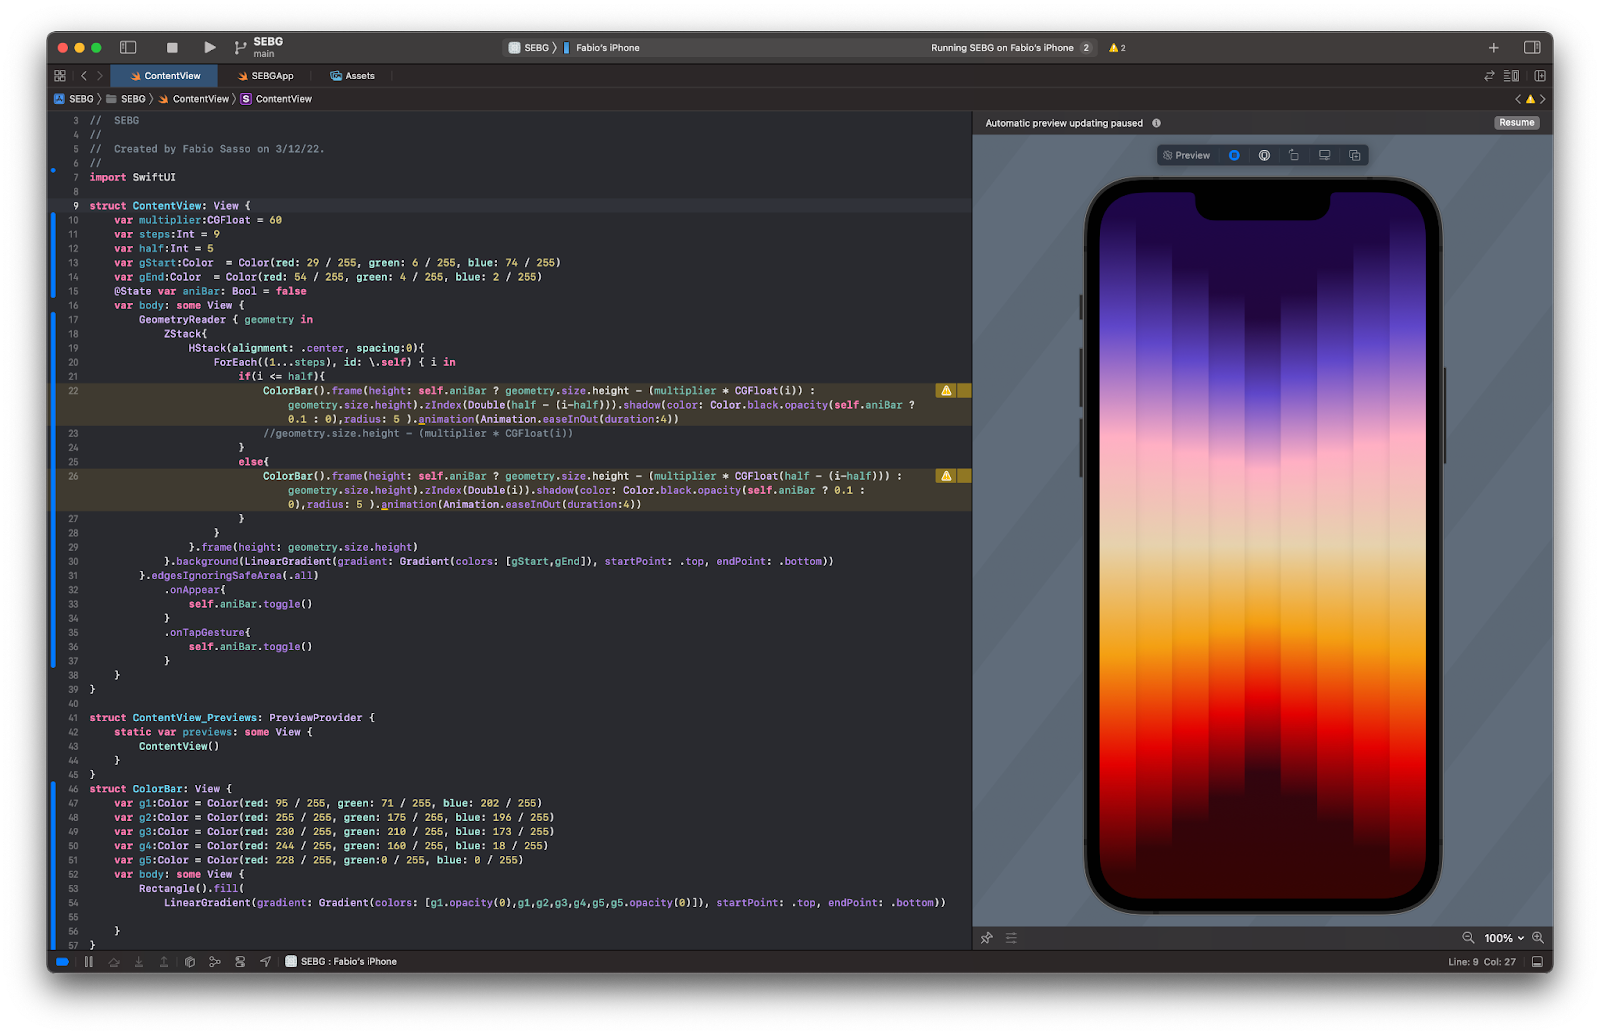
//
//  ContentView.swift
//  SEBG
//
//  Created by Fabio Sasso on 3/12/22.
//
import SwiftUI

struct ContentView: View {
    var multiplier:CGFloat = 60
    var steps:Int = 9
    var half:Int = 5
    var gStart:Color  = Color(red: 29 / 255, green: 6 / 255, blue: 74 / 255)
    var gEnd:Color  = Color(red: 54 / 255, green: 4 / 255, blue: 2 / 255)
    @State var aniBar: Bool = false
    var body: some View {
        GeometryReader { geometry in
            ZStack{
                HStack(alignment: .center, spacing:0){
                    ForEach((1...steps), id: \.self) { i in
                        if(i <= half){
                            ColorBar().frame(height: self.aniBar ? geometry.size.height - (multiplier * CGFloat(i)) : geometry.size.height).zIndex(Double(half - (i-half))).shadow(color: Color.black.opacity(self.aniBar ? 0.1 : 0),radius: 5 ).animation(Animation.easeInOut(duration:4))
                            //geometry.size.height - (multiplier * CGFloat(i))
                        }
                        else{
                            ColorBar().frame(height: self.aniBar ? geometry.size.height - (multiplier * CGFloat(half - (i-half))) : geometry.size.height).zIndex(Double(i)).shadow(color: Color.black.opacity(self.aniBar ? 0.1 : 0),radius: 5 ).animation(Animation.easeInOut(duration:4))
                        }
                    }
                }.frame(height: geometry.size.height)
            }.background(LinearGradient(gradient: Gradient(colors: [gStart,gEnd]), startPoint: .top, endPoint: .bottom))
        }.edgesIgnoringSafeArea(.all)
            .onAppear{
                self.aniBar.toggle()
            }
            .onTapGesture{
                self.aniBar.toggle()
            }
    }
}

struct ContentView_Previews: PreviewProvider {
    static var previews: some View {
        ContentView()
    }
}
struct ColorBar: View {
    var g1:Color = Color(red: 95 / 255, green: 71 / 255, blue: 202 / 255)
    var g2:Color = Color(red: 255 / 255, green: 175 / 255, blue: 196 / 255)
    var g3:Color = Color(red: 230 / 255, green: 210 / 255, blue: 173 / 255)
    var g4:Color = Color(red: 244 / 255, green: 160 / 255, blue: 18 / 255)
    var g5:Color = Color(red: 228 / 255, green:0 / 255, blue: 0 / 255)
    var body: some View {
        Rectangle().fill(
            LinearGradient(gradient: Gradient(colors: [g1.opacity(0),g1,g2,g3,g4,g5,g5.opacity(0)]), startPoint: .top, endPoint: .bottom))

    }
}
You can also download it via GitHub here and try on your iPad with Playgrounds too.


